Vitro Shard Programming
Vitro Shard programming
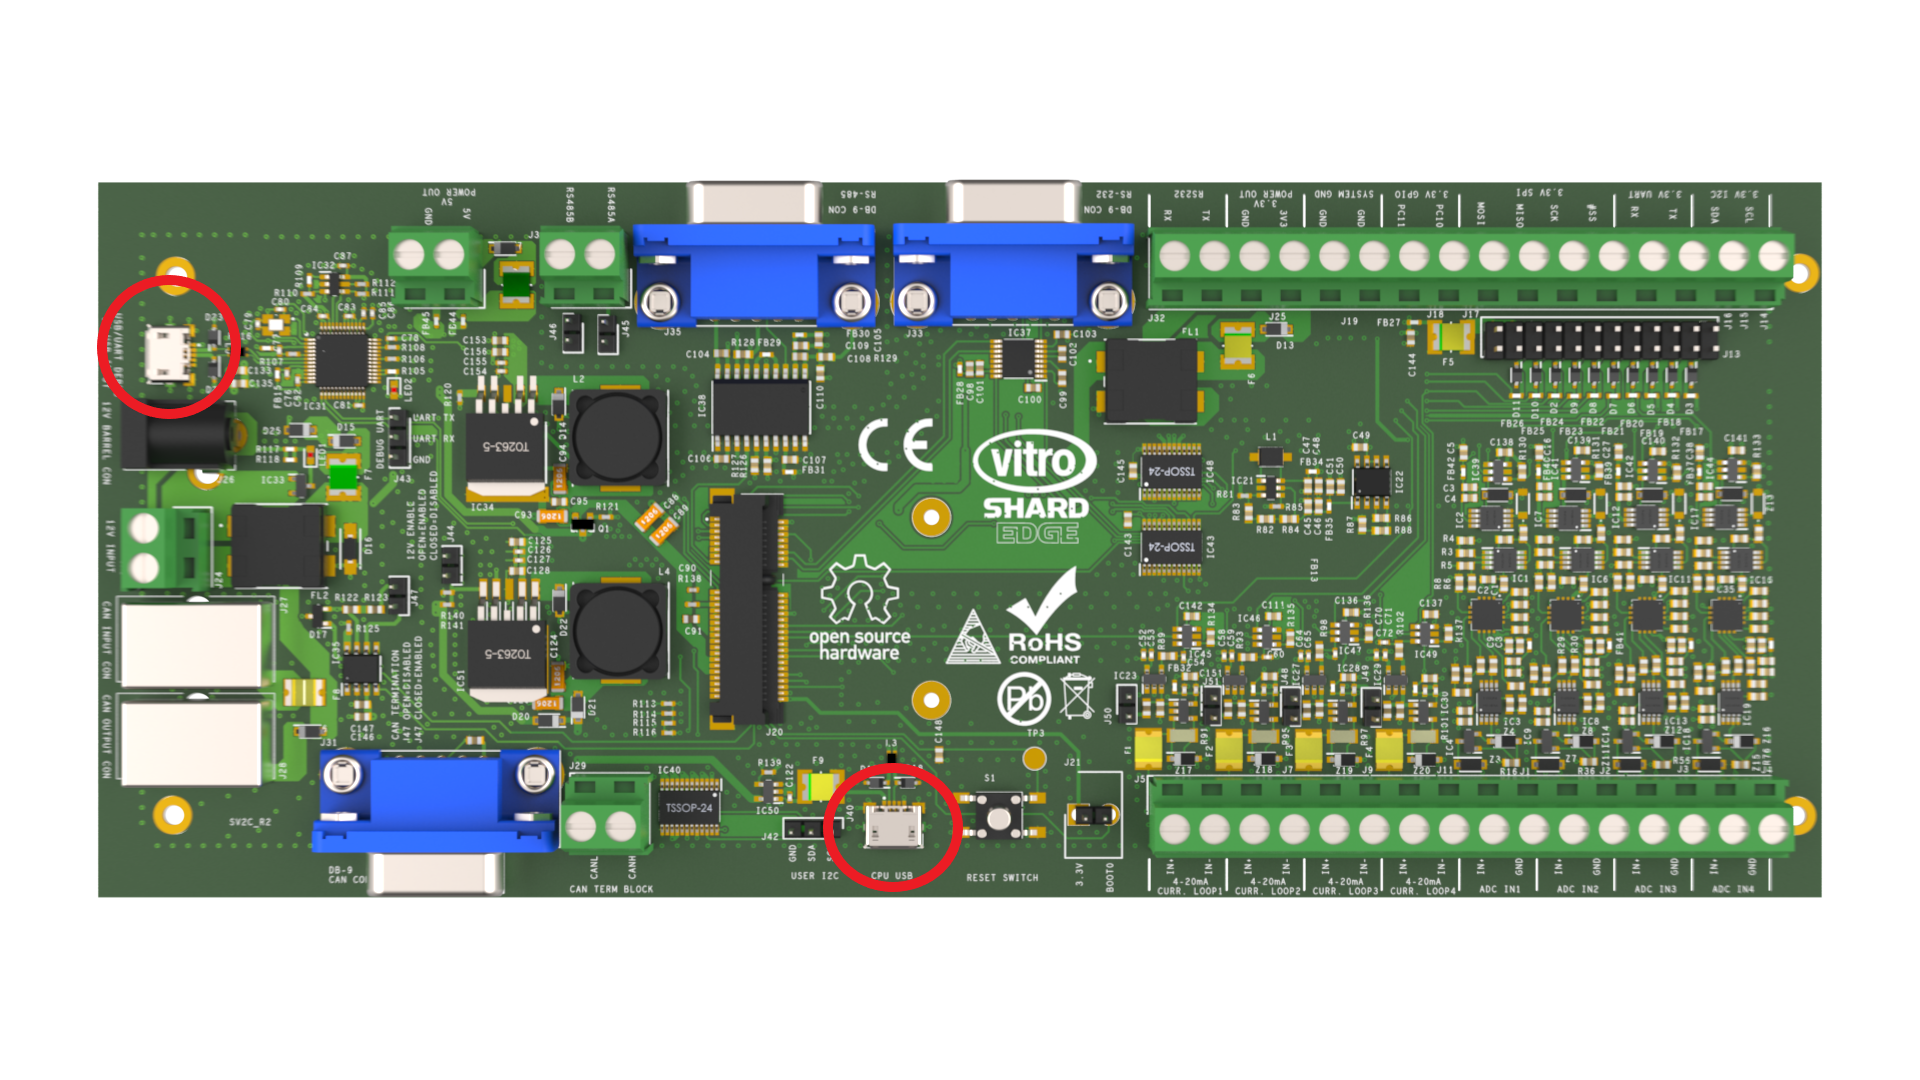
Shard Edge comes with two onboard USB connectors, namely the USB/UART DEBUG connector and the CPU USB connector. USB programming is made available using the bootloader interface (USB DFU) mapped to the CPU USB.

Vitro Shard Edge USB ports
USB
The bootloader interface enables the MCU flash via any serial interface (UART, I2C, SPI, or USB). Nevertheless, the USB is suggested and hence documented here.
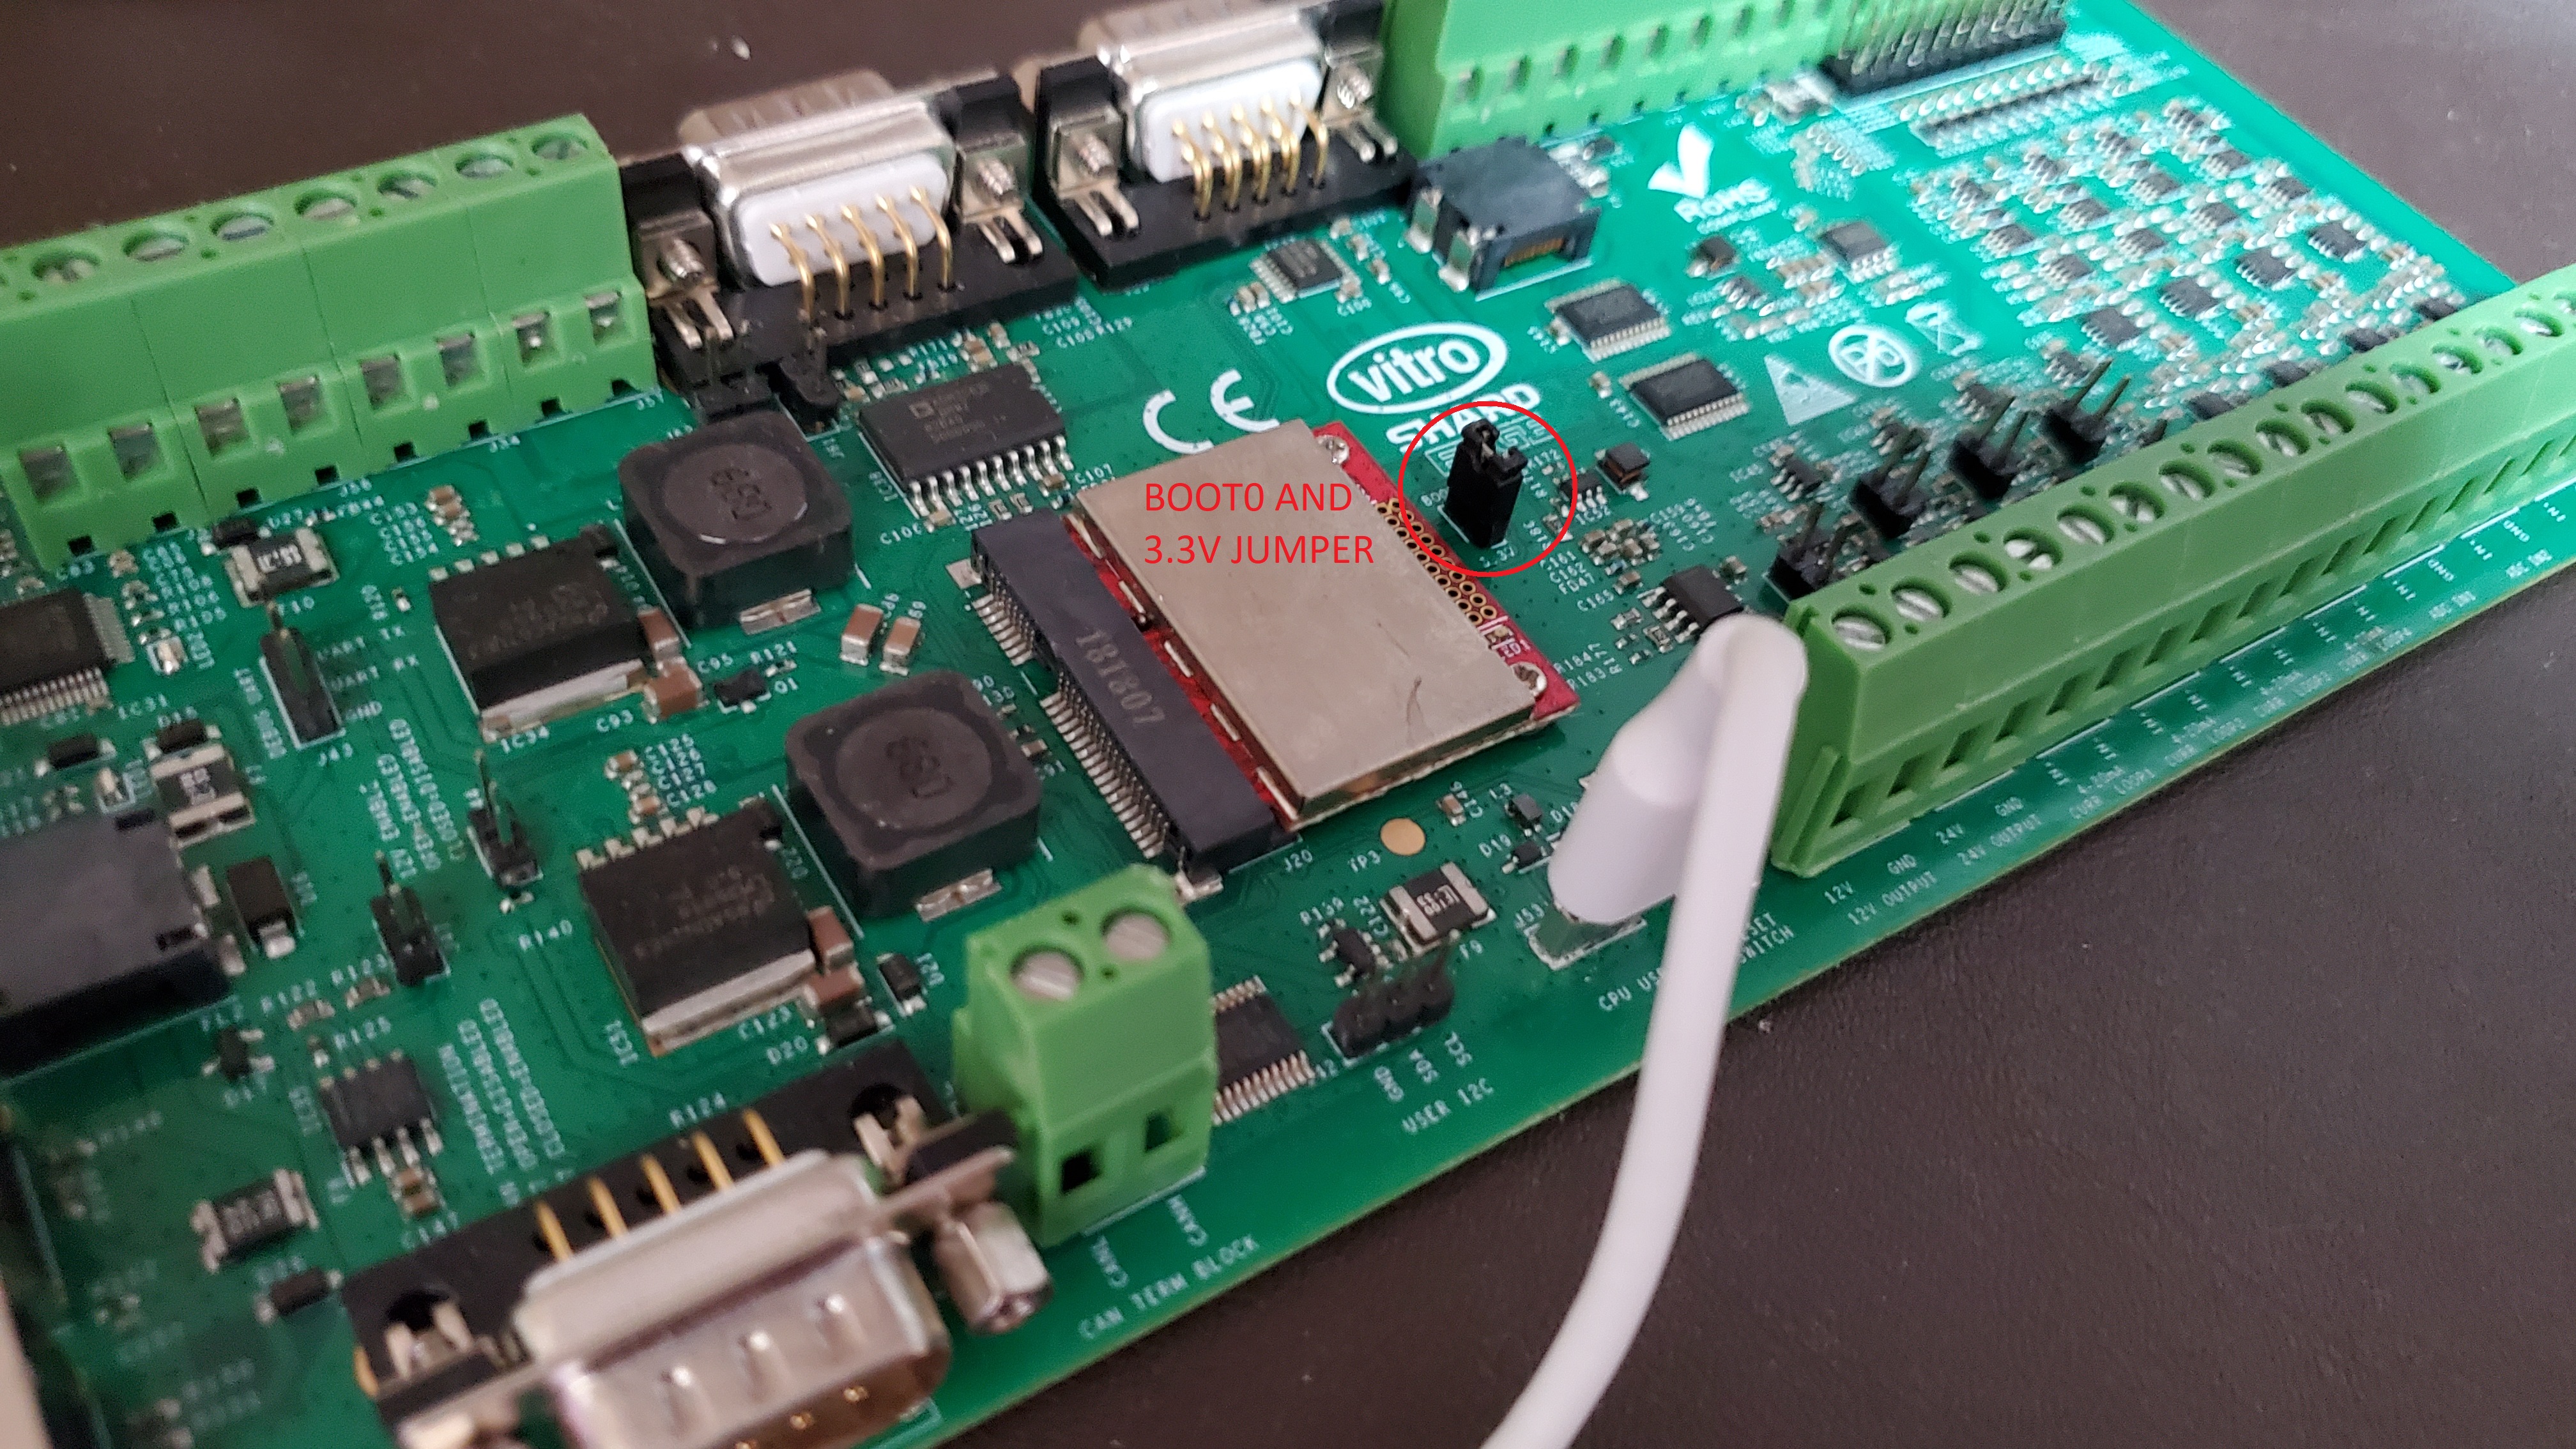
USB programming is possible by booting into bootloader mode and the way this mode is activated strictly depends on the specific MCU. In the case of Vitro Shard, only BOOT0 pin (J64 header on the Vitro Shard Edge board) needs to be shorted to a 3.3V source (VDD). For the sake of clarity, the picture below shows the header that needs to be shorted:
More details on the Boot mode are available here.

Jumper between pins Boot0 and 3.3V.
Now, a board reset is needed to boot the MCU into bootloader mode.
Application can now be flashed either using the DFU-Util or the STM32CubeProgrammer. For detailed installation instructions, please select your OS and follow the steps.
DFU-Util
If Vitro Shard is properly configured, you can detect it by using:
dfu-util --listThis is what you should see in case everything is set properly and one single DFU capable device is attached:
dfu-util 0.9

Copyright 2005-2009 Weston Schmidt, Harald Welte and OpenMoko Inc.

Copyright 2010-2016 Tormod Volden and Stefan Schmidt

This program is Free Software and has ABSOLUTELY NO WARRANTY

Please report bugs to http://sourceforge.net/p/dfu-util/tickets/


Found DFU: [0483:df11] ver=2200, devnum=5, cfg=1, intf=0, path="1-2", alt=2, name="@OTP Memory /0x1FFF7000/01*0001Ke", serial="205A377E5234"

Found DFU: [0483:df11] ver=2200, devnum=5, cfg=1, intf=0, path="1-2", alt=1, name="@Option Bytes  /0x1FFF7800/01*040 e/0x1FFFF800/01*040 e", serial="205A377E5234"

Found DFU: [0483:df11] ver=2200, devnum=5, cfg=1, intf=0, path="1-2", alt=0, name="@Internal Flash  /0x08000000/512*0002Kg", serial="205A377E5234"
This is what you will see in case two DFU capable devices are attached:
dfu-util 0.9

Copyright 2005-2009 Weston Schmidt, Harald Welte and OpenMoko Inc.

Copyright 2010-2016 Tormod Volden and Stefan Schmidt

This program is Free Software and has ABSOLUTELY NO WARRANTY

Please report bugs to http://sourceforge.net/p/dfu-util/tickets/


Found DFU: [0483:df11] ver=2200, devnum=6, cfg=1, intf=0, path="1-2", alt=2, name="@OTP Memory /0x1FFF7000/01*0001Ke", serial="205A377E5234"

Found DFU: [0483:df11] ver=2200, devnum=6, cfg=1, intf=0, path="1-2", alt=1, name="@Option Bytes  /0x1FFF7800/01*040 e/0x1FFFF800/01*040 e", serial="205A377E5234"

Found DFU: [0483:df11] ver=2200, devnum=6, cfg=1, intf=0, path="1-2", alt=0, name="@Internal Flash  /0x08000000/512*0002Kg", serial="205A377E5234"

Found DFU: [0483:df11] ver=2200, devnum=7, cfg=1, intf=0, path="1-3", alt=2, name="@OTP Memory /0x1FFF7000/01*0001Ke", serial="2055377E5234"

Found DFU: [0483:df11] ver=2200, devnum=7, cfg=1, intf=0, path="1-3", alt=1, name="@Option Bytes  /0x1FFF7800/01*040 e/0x1FFFF800/01*040 e", serial="2055377E5234"

Found DFU: [0483:df11] ver=2200, devnum=7, cfg=1, intf=0, path="1-3", alt=0, name="@Internal Flash  /0x08000000/512*0002Kg", serial="2055377E5234"
If Vitro Shard is the only DFU capable device connected to the host computer, you can run this command to flash the image to Vitro Shard:
dfu-util -a 0 -i 0 -s 0x08000000:leave -D <path to binary file>otherwise the MCU serial needs to be specified:
dfu-util -a 0 -i 0 -S <MCU serial> -s 0x08000000:leave -D <path to binary file>STM32CubeProgrammer
The installation process for STM32CubeProgrammer has been explained here. Now, open the program and select the correct interface. In this case, select USB.
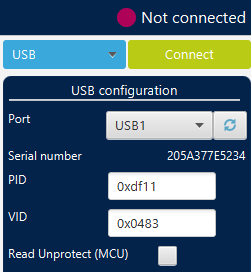
If the MCU entered bootloader mode properly, then click the refresh button close to Port to list the available devices. If detected, the USB label will appear along with the MCU serial as shown in the picture below:

STM32CubeProgrammer USB detection example
Click Connect. Now you can read and write the flash memory or change Option Bytes. To configure the Option Bytes, click on the OB button on the left-hand side.
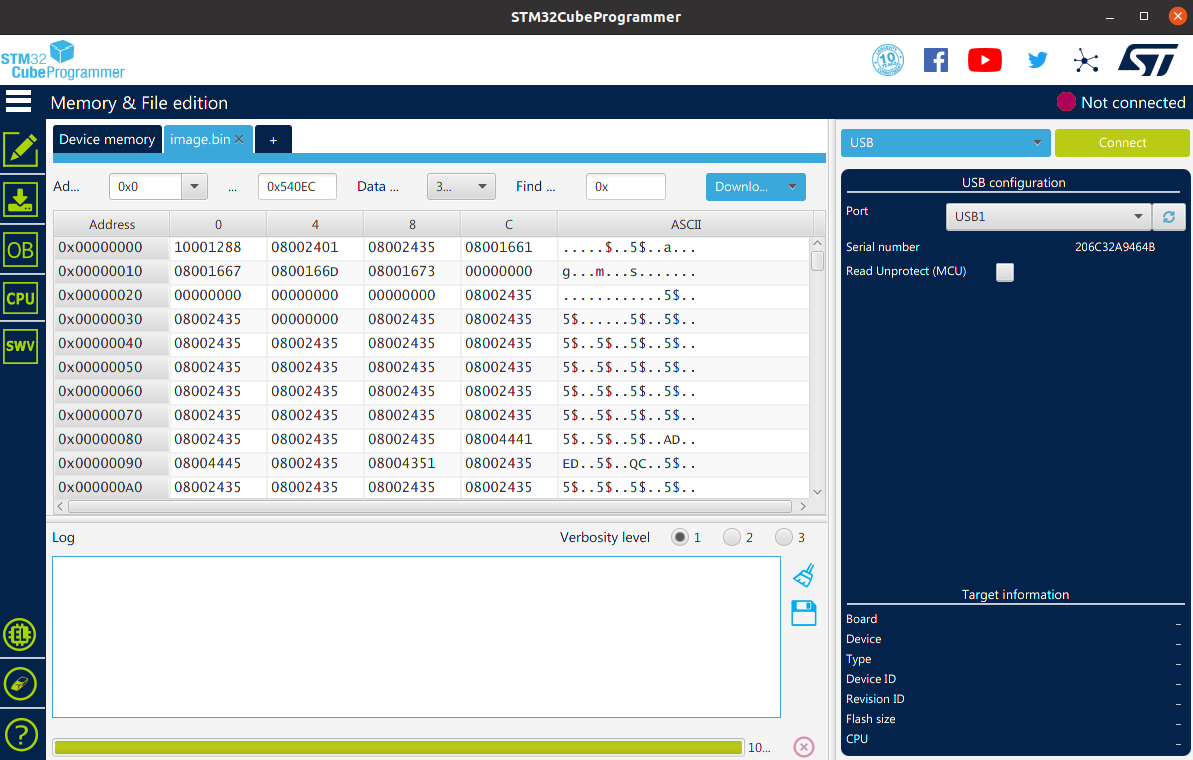
To flash the image binary file, you need first to click on the + sign on the top tab. Then, click on Open File and select the image to flash. Finally, click on Download. If default options are kept, the flashing process should succeed. For the sake of clarity, the program interface is shown below:

STM32CubeProgrammer interface.
Updated 9 months ago
