Vitro Crystal OS Installation
OS Installation
In this installation guide, we will show how to flash an SD card and boot Vitro Crystal for the first time. If you need more information regarding the OS, please check the Operating System documentation.
You will need some equipment to proceed in this installation guide:
- Vitro Crystal board.
- 12V Power Supply with DC jack.
- Ethernet cable.
- MicroSD card.
- USB-UART converter (optional).
- HDMI cable (optional).
- Keyboard (optional).
The first step is to download the distro:
- Yocto-based OS: image, bmap, image signature, bmap signature.
You can check all the Yocto-based OS releases here.
Before flashing the SD card with the image, you should check the files (although not a requirement, it is good practice). You can read our Verifying Signed Binary documentation for a tutorial on how to set it up.
The method to flash the Vitro Crystal OS on the SD card is different for each OS on your host computer. The most universal and easiest way is to use balenaEtcher. It has a graphical user interface (GUI), it is open-source and cross-platform. Click here to go to this section. We also show how to flash the OS image using the command-line interface (CLI), just click here to go to the section.
Using balenaEtcher
You will need to download and install balenaEtcher for the OS of your host computer. Now follow these steps:
- Insert the micro SD card into the card reader on your host computer.
If you need to use a MicroSD to SD adapter, please pay attention to the write protection switch on the left-hand side. The switch must be slid up (unlock position). For more details, check here.
- Run balenaEtcher.
- Click on Select Image and select the downloaded Vitro Crystal OS image, e.g., vitroio-gateway-imx6dl-crystal-sd-2.2.10-debug.wic.gz.
- Make sure that the SD card is selected. Otherwise, click on Change and choose your SD card to be flashed.
- Click on the Flash! button to start flashing.
In this step, it is necessary to have administrator rights. Thus, you may be prompted for asudo useror administrator password.
- Done! Just insert the microSD card into Vitro Crystal.
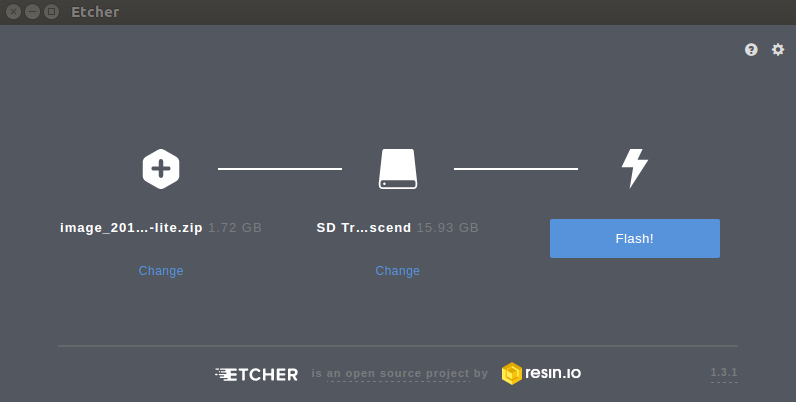
This is how it should look:

Etcher interface.
You can go to the next section to boot the board.
Using CLI
To flash the SD card, we use BMAP Tools. If you need help on installing it or what it is, please check our Requirements document. But essentially, it is a convenient tool to flash an image very fast. After making sure you have BMAP Tools installed (this is also cross-platform!), follow these steps:
- Insert the micro SD card into the card reader on your host computer.
If you need to use a MicroSD to SD adapter, please pay attention to the write protection switch on the left-hand side. The switch must be slid up (unlock position). For more details, check here.
- Identify the SD card descriptor by running the following command:
lsblk | grep sdYou should have an output that looks like this:
sda      8:0    0   50G  0 disk
├─sda1   8:1    0    1M  0 part
├─sda2   8:2    0  513M  0 part /boot/efi
└─sda3   8:3    0 49.5G  0 part /
You can also use other commands to identify your device, like dmesg or fdisk -l. Either way, here the device descriptor is sda.
- Unmount the SD card:
sudo umount /dev/<SD card descriptor>- Flash it using BMAP Tools:
sudo bmaptool copy --bmap <file.bmap> <file.gz> /dev/<SD card descriptor>
If you don't want to use BMAP Tools, you can run do the following:
- Unzip the file
gzip -cdk <file.gz>.- Use
ddto flash the image to the SD cardsudo dd of=/dev/<SD card descriptor> bs=16M status=progress.
- If it was successful, everything is done! Just insert the microSD card into Vitro Crystal.
You can go to the next section to boot the board.
Booting Vitro Crystal
You can choose to boot Vitro Crystal from two different storage spaces: eMMC and SD card. If you want to flash the eMMC, you can check out the eMMC documentation page, or if you want more information regarding the hardware side, please check our Hardware Guide. As you just flashed an SD card, use it to boot Vitro Crystal.
To prepare the board, please do the following:
- Short pins
1-2onJ12header. You can use a jumper if you like. - Configure
SW2switches accordingly:
| Switch number | 1 | 2 | 3 | 4 | 5 | 6 | 7 | 8 |
|---|---|---|---|---|---|---|---|---|
| Value | 1 | 0 | 1 | 0 | 0 | 0 | 1 | 0 |
Value 1 is for the upper switch position, while 0 is the opposite. Vitro Crystal can boot from the SD card or eMMC memory. For more information, please check the Hardware Guide.
- Connect the USB-UART converter to the UART (
J14) header (optional).- Otherwise, you can connect a keyboard to the USB port and an HDMI cable to the HDMI port on Vitro Crystal. The HDMI cable should also be connected to a monitor.
If you are using the USB-UART converter, please don't forget to set it up. For more information, check the UART documentation.
- Connect an Ethernet cable.
- Power on Vitro Crystal.
Vitro Crystal should now boot up and prompt you for user and password. The default credentials are as follows:
| OS | User | Password |
|---|---|---|
| Yocto-based | root | vitrotv |
If this is the first time the board is booting up, and you want to connect it to Vitro Cloud Infrastructure, you will need to provision it. Please check our Provisioning documentation on how to do it.
Updated 9 months ago
